
A Critical Look at Mega Man 4 Stages: Dr. Wily Stages 3 & 4

TMMN Staff
Wily Stage 3 and Music
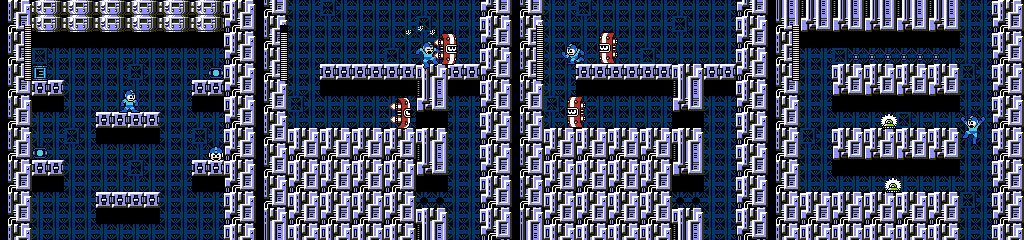

This is the path leading to the teleporter room. As you can see, there’s not much to it. This is fine, given that we’ll be taking on all the bosses with one set of lives, and rewarding us for pressing against the wall on the third screen but setting up Garyoby as a trap for players who miss the first hole is a nice touch.
However, the first Shield Attacker is a serious mistake. It moves toward the player no matter which hole they take, and players going right will fall on top of it. It can be avoided by going left, but the player has to dodge it immediately by jumping to the right, as going for the hole will just get them hit by the other one. It’s a choice between instant damage or making a split-second dodge and not taking the obvious choice of going down. I wouldn’t make such a big deal of one mistake like this in a normal stage, (Bubble Man was worse about that unless you know where the Tanishis are already) but since there’s nothing else remarkable about this place, falling on the Shield Attacker is the only thing that sticks in my memory.
The boss rematches themselves are identical, save for Pharaoh Man, who’s room is now completely flat like the others. It’s an interesting change to the fight, as it makes his jumping attacks easier to avoid since we have room to slide, but we’ll have to dodge all of the charged projectiles.
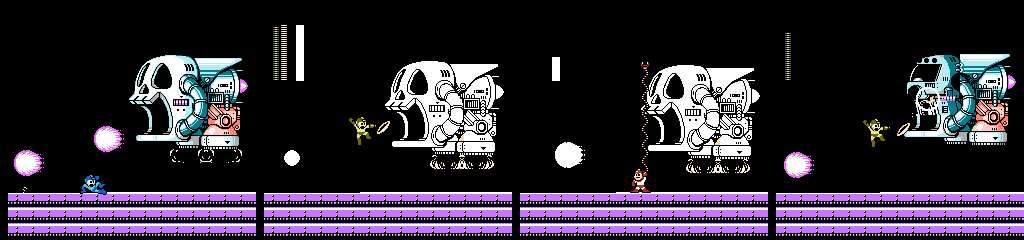
Wily’s first form is a breeze. It moves up and down while firing huge projectiles in groups of three, but it can’t hit Mega Man if he’s standing under it. It’s weak to the Ring Boomerang (like practically everything else), but if you want to get more mileage out of the Wire, it works fine too.

The second form now moves horizontally and is much more aggressive, but not necessarily more fun. It simply pelts Mega Man with an unending stream of the same projectiles, and with better aim. Mega Man can walk under it without taking damage, and while it can fire straight down it won’t shoot backwards, so we can use this to catch a break if needed.
The flashing thing on the front is now the only part that takes damage. Normal shots can’t hit it without help from Rush/Items, and charge shots barely reach. It’s weak to Drill Bombs, but we can’t reach it with those either. What we need to do is explode them before they touch the main body and bounce off, which is pretty awesome as we’ve barely had any reason to use them that way until now.
The downside is that players may not be aware that they can do this at all and Wily isn’t giving us much time to figure it out. We also don’t have a good alternative option, though the Skull Barrier can at least block the shots, and we can still get away with using Wire at times.
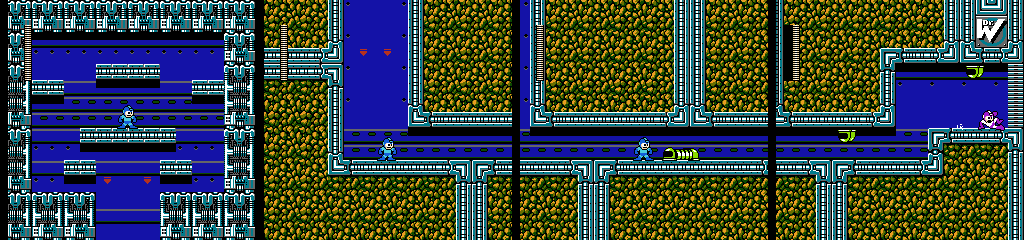
Wily escapes again, and we’re left with one last area to walk through before the end. This first room is either unfinished or a brilliant troll, as it looks like the usual goodie room but there’s nothing here. Imorm is the only thing we meet in the tunnel, and since the ceiling is so low they’ll drop well before we get to them, meaning one could just walk forward while mashing B and make it through just fine. Attempting to stop them with the Flash Stopper won’t prevent them from appearing, so this just makes it harder as we’ll have to slide under them.
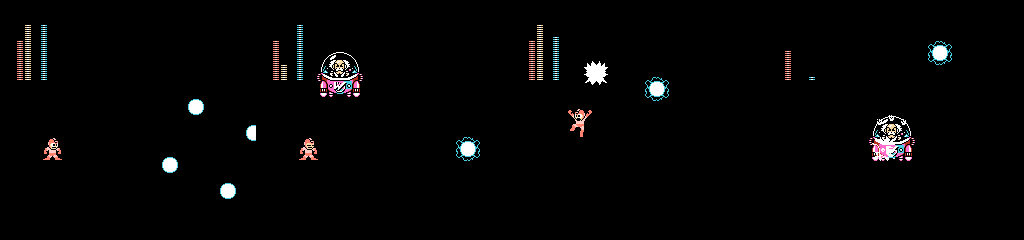
Though this setup becomes notoriously difficult in later games, the original version is quite simple. Four balls of energy start swirling together, and when they meet they create a larger ball that moves towards us. This also causes a brief flash, allowing us to see where Wily is in the darkness. He only appears for a frame, but he’ll remain in that spot for roughly as long as the projectile is on screen.
This repeats, with Wily in a different spot each time. It’s possible for him to appear on Mega Man’s level as well, but it seems to be extremely rare as he prefers to stay closer to the height of the life bars or occasionally under the floor. He only takes damage from the Ring Boomerang or Pharaoh Shot, so without those you’ll have to run out of lives or grind on the worms outside. Ring only deals one damage, but a charged Pharaoh deals six and can hit him anywhere on the screen, and he often appears above Mega Man, allowing the player to hit him with the floating ball easily.
Though Mega Man takes eight damage from the projectiles, they’re fairly easy to dodge and with full weapon energy it won’t take long to win this. It’s a good fight, and keeps the player on their toes without simply dumping damage at them like the last form. It’s also nice that the weakness is also the weapon you’ll most want to use, so players can figure it out quickly.
Prev/Next in Category(s)
Prev/Next by Date

The Script for Mega Man Legends Timelines #1
Behold some of the first steps in how this book came together.

Holiday ’25 Update
Mega Man plans. Dr. Wily laughs.


Comments